Hello fabulous,
For years I used to make polymer clay mosaics. I don't know if you've heard of Laurie Mika and her fabulous book,
Mixed Media Mosaics? I was smitten and used some of her techniques for making my own boxes and frames. I have made many, but I got burned out on making them. They make great gifts! I took photos of the process, but I struggled to get good pictures. I will post them anyway since the mirror I worked on is done.

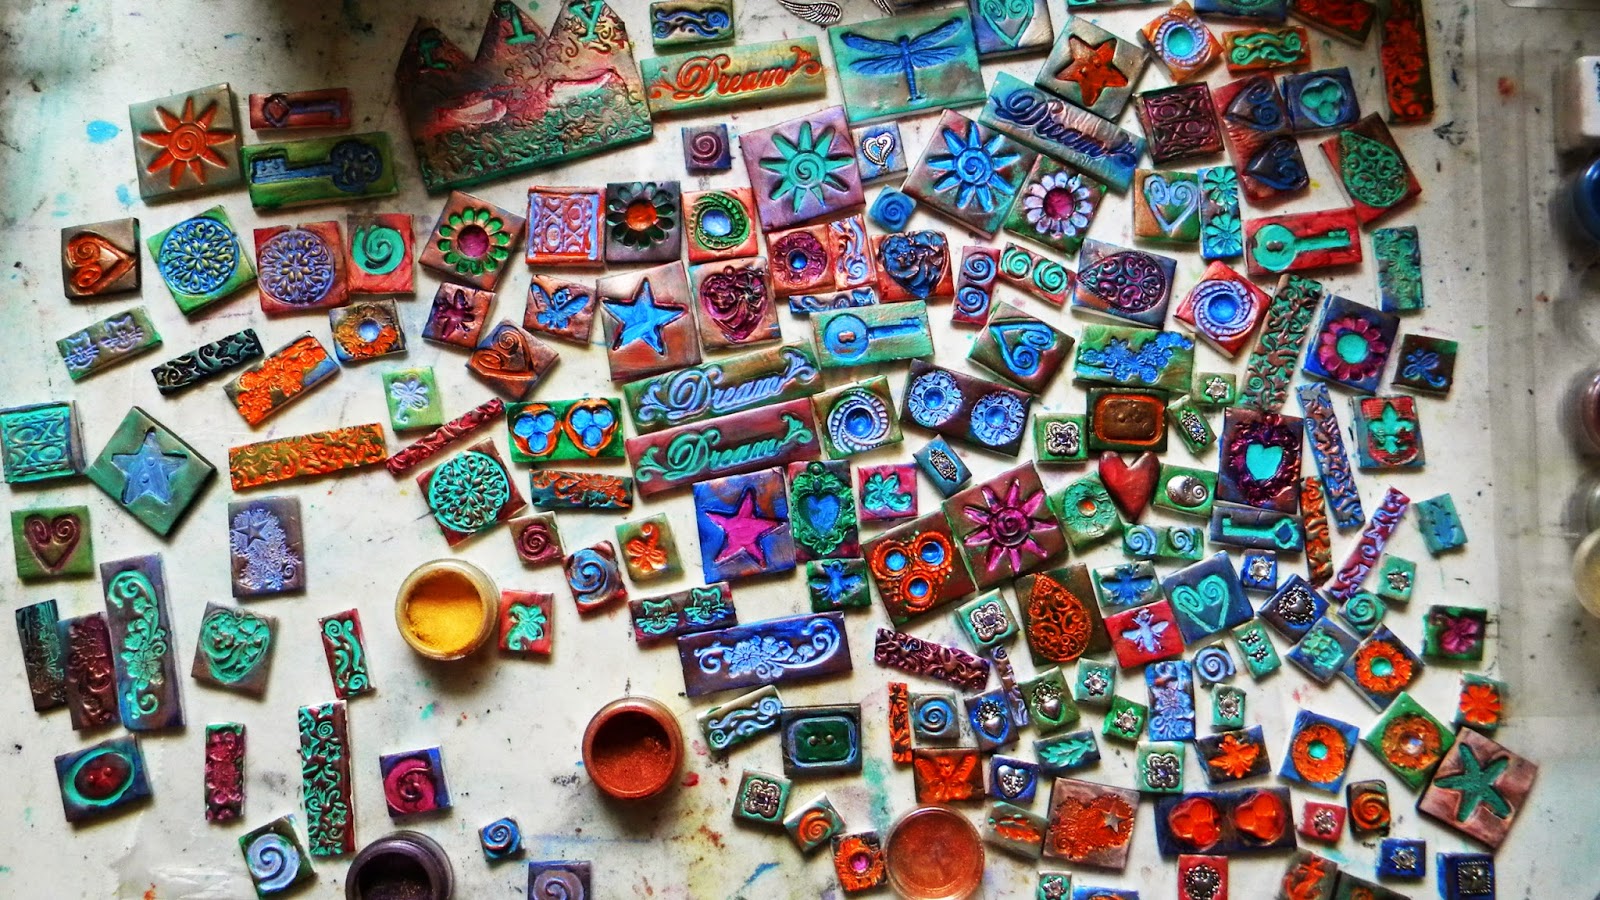
I didn't get pictures from the tile making process, but you knead a block of polymer clay and roll it flat like cookie dough with a rolling pin. The slab should be about 1/8" thick. I then use rubber stamps, old buttons, charms, and found objects that make good indentations. I cut out the tile with a polymer clay blade. I put the tiles on a baking pan and put a same-size pan on top, bottom up, like a lid. I secure the pans together with binder clips and bake in the oven per manufacturer's instructions. Carry the pans outside, release one of the clips and slide top pan open to release fumes. I like to use Sculpey III, but I'm sure Fimo and other brands are good too. I tried self-drying clay for a batch and it was very difficult to work with. You can use any color clay since you're going to paint over the tiles, but black will make the tiles darker.

Here is a close up of the jewelry charms I baked into the clay. They add bling! These are the tiles after one coat of paint where I usually fill in all the indentations and wipe off the rest. Looks messy at this stage....
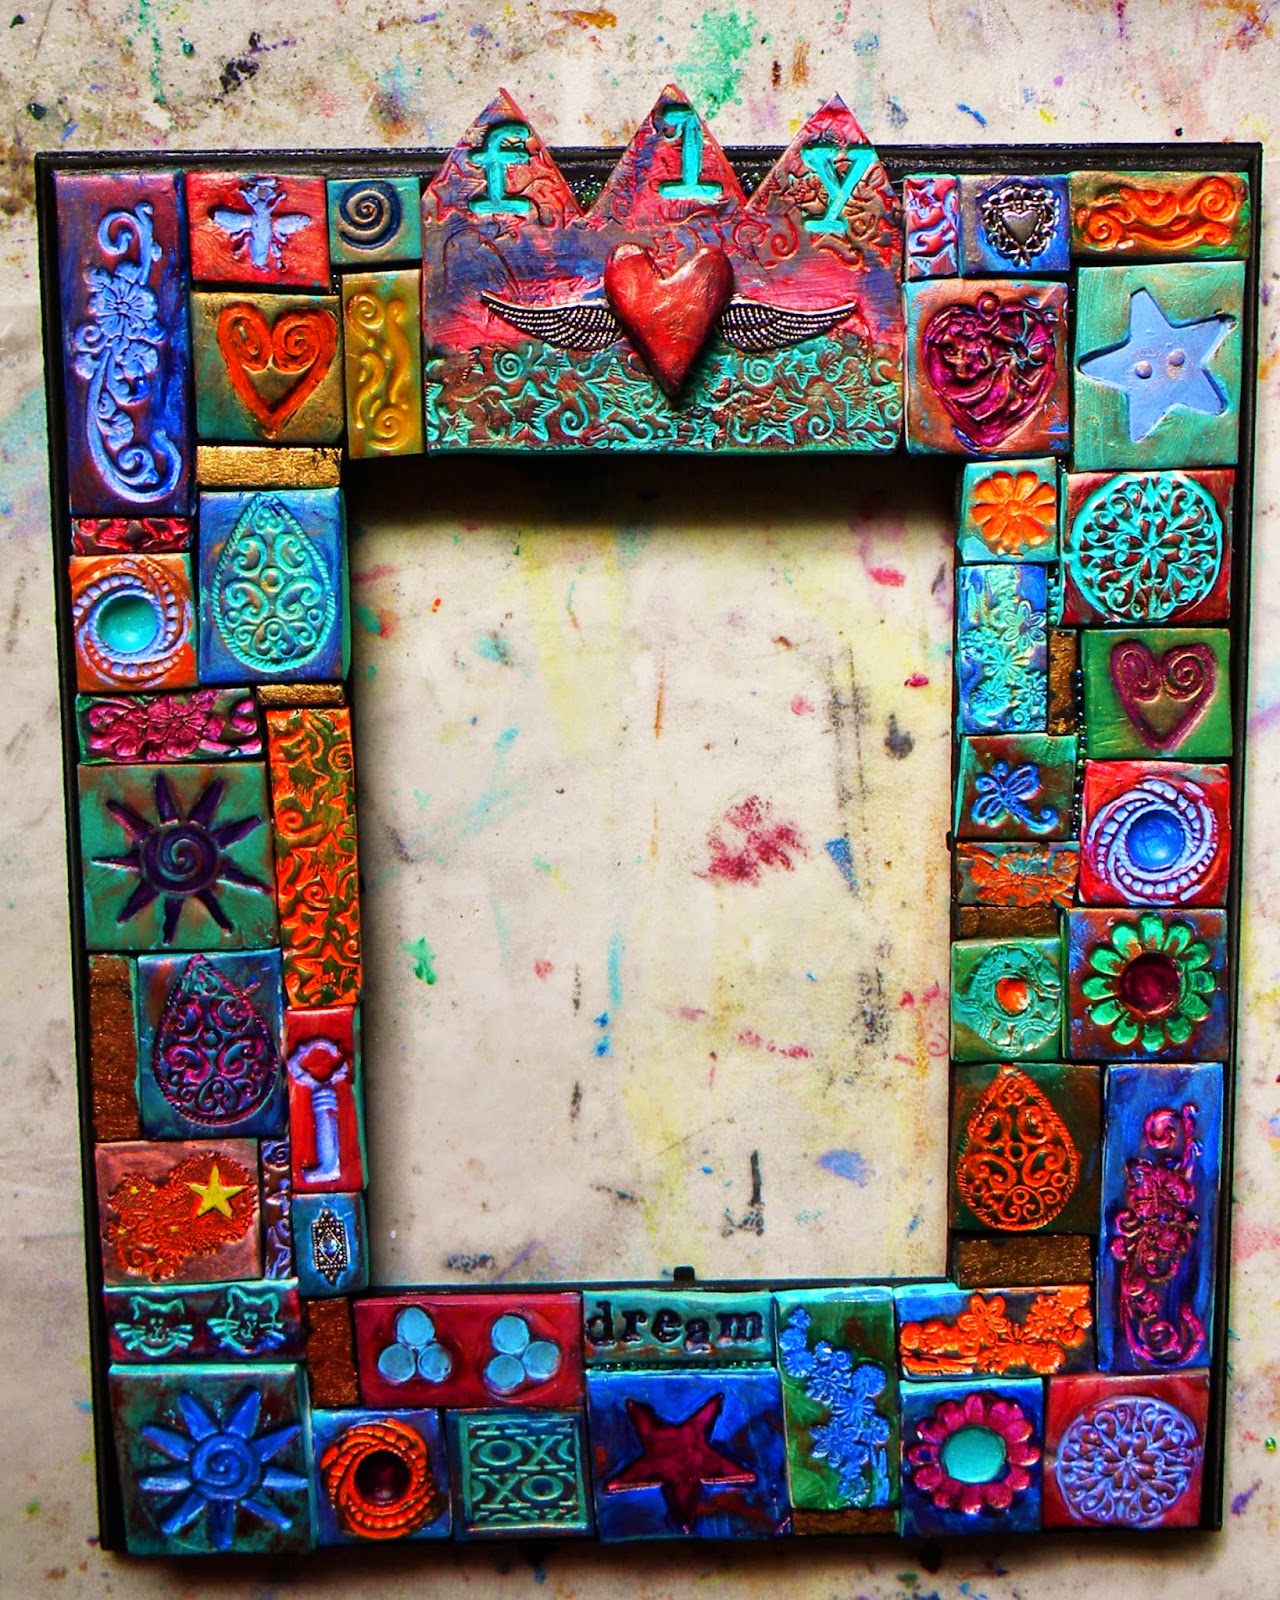
This is a mirror frame. I took out the glass part and painted the frame front and back with black craft paint. It seals the wood and also adds "tooth" to the surface, which makes it easy to adhere the tiles. Attach a sawtooth hanger on the back before adding the tiles. There are sometimes holes for hanging, but it's difficult to use those and get the mirror straight on the wall. (At least I find it so..lol.)
Same two pictures in different light. This is the second coat of paint. I usually smear it on with my fingers. I try to vary the colors to get more tiles to choose from for my project.
Third coat of paint, which is embossing powder in different colors that I also smear on with my fingers. I use Perfect Pearls. See how it all came together? Now the tiles don't look messy at all, but handmade for sure. Embossing powder smooths everything out and adds a nice highlight to any ridges. Where there is white shining through from the tile, I usually go over it with a paint pen or a fine brush, or fill in larger areas, like the purple star and sun with more of the same paint.
A basket of yummy tiles! Now my mirror frame is dry too and I sand the edges. Then it's time to match up the tiles for the design. This is the fun part... It can be painstaking, but I have never done a project that didn't come together just perfectly. :)
When the design is done, I put the tiles in order on the table and spread LOTS of glue on one area at a time. I use Aleene's craft glue, which works great, but Weldbond is also a good brand of glue for mosaic tiles. For the wings and heart on the center piece, I used E6000 jewelry glue, which is heavy duty. I really like my pieces to be solid. Where there are small gaps between the tiles, I pour in a string of seed beads. It adds bling and gives the piece a finished look.
Finished! I painted the edges with good black acrylic paint. I also like to paint the back one more time to make it really look good. I sign it on the back.
Are you willing to try one of these? It's not hard, but it looks hard. :) What are you working on now?
I have a sale going on in my etsy shop, 20% on everything until 12/31/14. Check it out..
http://etsy.com/shop/greeneearthoriginals
xoxo
Maria